

What are the steps to register Revit windows?
- Standard Revit Windows, Doors and Curtain panels with transparent glazing can be registered as windows. Windows modelled as Generic models can also be registered if they have faces with transparent glazing.
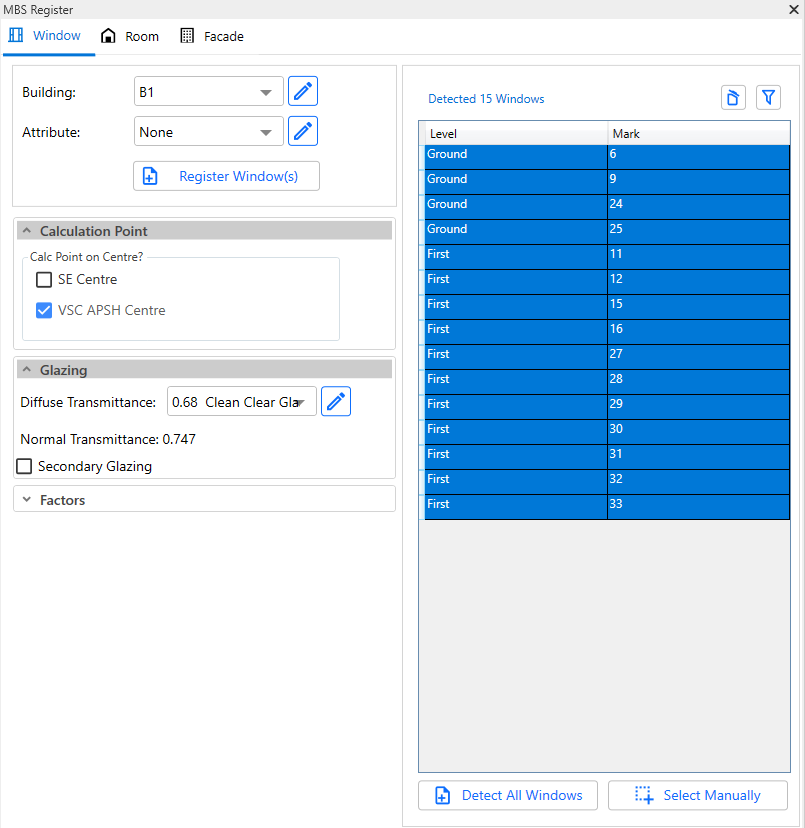
- Open the Register Dialog and go to Window tab.
- Detect All Windows button shows all the windows which can be registered.
- Users can also pick windows to register by using Select Manually button. Any windows which are already registered will not show up here.
- Press Register Window(s) button to register the windows which are selected on the data grid.
- Window Id
- Building Name is read from the Building combo box.
- Floor Name is read from the Revit Level where the window is placed. If Revit Level is not defined then the centre of the window is used to detect the correct level name.
- Window name is read from the Revit Parameter ‘Mark‘. If the Mark is empty, Prefix W will be used with a counter. e.g. W1 for the first unnamed window.
- Window Normal
- Normal is taken from the Window, Door object’s facing orientation.
- Normal is taken from the host wall’s facing orientation in case of Curtain panels.
- The Normal should be facing away from the room.
- If the orientation is incorrect for the windows, Auto Correct Window Orientation option can be used to obtain correct normal.
- The normal is decided by intersecting with room or floor in the direction of window facing orientation then on the opposite direction.
- It handles the situation when window/wall flipped are incorrectly.
- If there is no room and floor then window’s facing orientation will be used.
- Shared parameters
- Some of the window properties are added as shared parameters in the model and they can be updated via Window tags or schedule.
- Building name, description, property type, glazing transmittance, adf, vsc and apsh offset values can be updated.
What are the steps to register Revit Rooms?
- Standard Revit Rooms which are placed in the model and are correctly bounded by the walls can be registered as rooms.
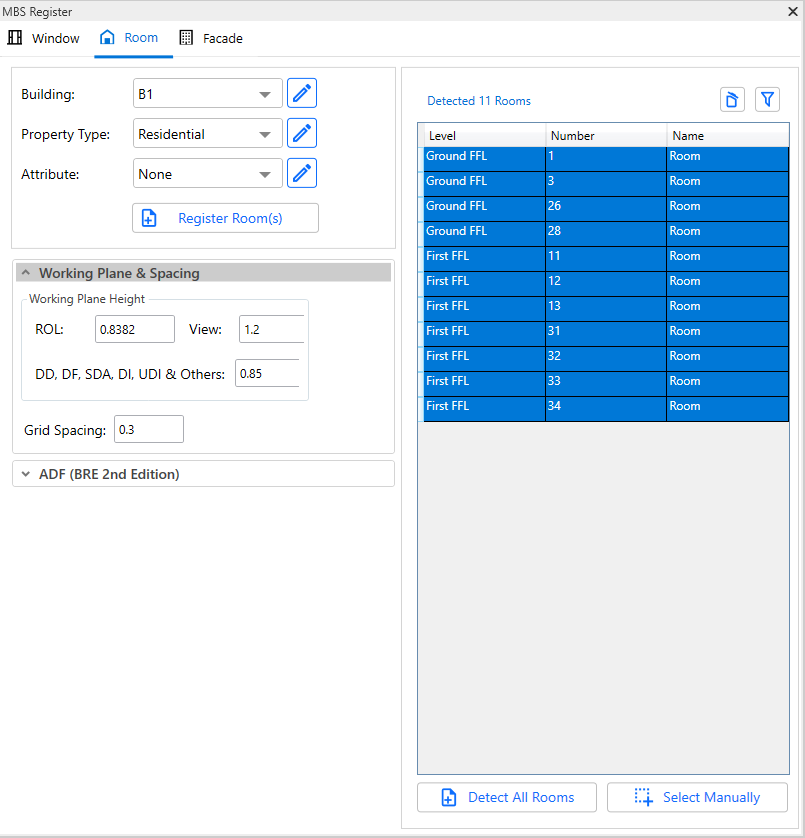
- Open the Register Dialog and go to Room tab.
- Detect All Rooms button shows all the rooms which can be registered.
- Users can also pick rooms to register by using Select Manually button. Any rooms which are already registered will not show up here.
- Register Room(s) button registers the rooms which are selected on the data grid.
- Room Id
- Building Name is read from the Building combo box.
- Floor name is read from the Revit Level where the room is placed.
- Room name is read from the Revit Parameter ‘Number‘. If the Number field is empty, prefix R will be used with a counter. e.g. R1 for the first unnamed Room.
- Room type is read from the Revit Parameter ‘Name‘.
- Ceiling Height is set at time of registration based on ray intersection of the nearest ceiling or roof. If this method fails then value defined in the register dialog is used. It can be changed later by simply modifying the shared parameter property MBS_CeilingHeight on Revit room or by Updating it via the Ceiling Height text box in the Update Mode.
- Shared parameters
- Some of the room properties are added as shared parameters in the model and they can be updated via Room tags or schedule.
- Building name, description, property type, required adf value, adf reflectance values, ceiling height and grid spacing can be updated.
What are the steps to register Revit Amenities?
- Standard Revit Floor and Mass objects which are placed in the model can be registered as amenities.
- Floor objects can have multiple faces but each face must be planar. Non planar face results are not calculated/displayed correctly.
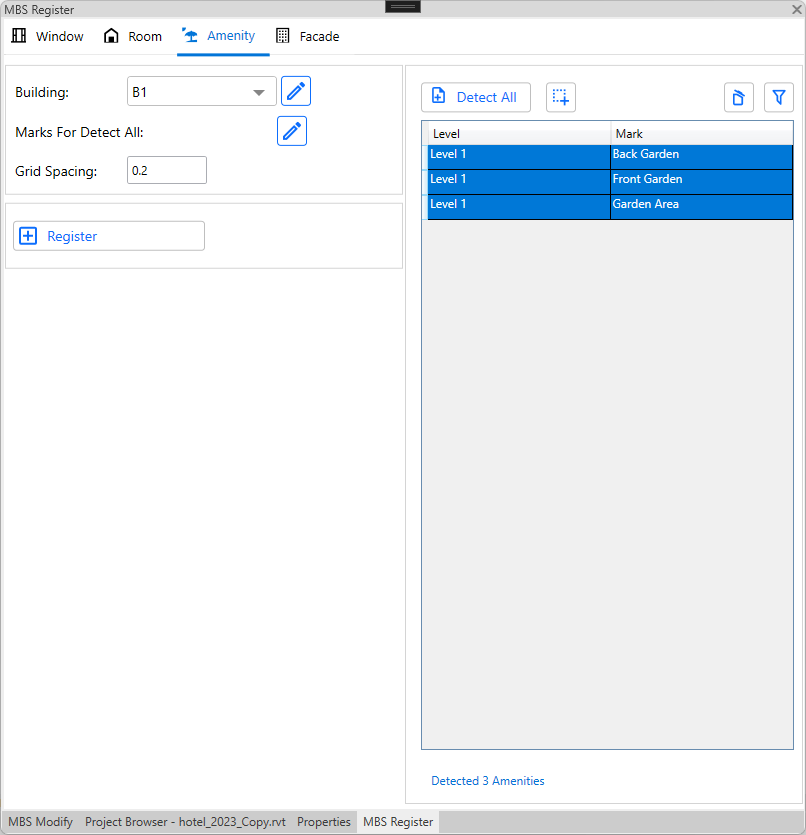
- Open the Register Dialog and go to Amenity tab.
- Detect All button shows all the amenities that matches Mark with keyword (e.g., Garden) listed in Marks For Detect All options.
- Users can also pick any Floor and Mass as amenities to register by using Select Manually button. It ignores the keyword check listed in Marks For Detect All options.
- Any amenities which are already registered will not show up here.
- Register button registers the amenities which are selected on the data grid.
- Amenity Id
- Building Name is read from the Building combo box.
- In case of linked model, the building name is taken from Mark of the linked instance.
- Floor name is read from the Revit Level where the amenity is placed.
- Amenity name is taken from Mark.
How to specify offset values for VSC, APSH, SE and ADF?
- The reference point for specifying the offset is on the glazing itself.
- Offset value should be positive to go towards the room and negative to go away from the room.
- The VSC offset will be set on the outside face of the window’s host wall.
- The APSH/SE offset will be set on the inside face of the window’s host wall.
- The ADF offset will be set in the middle of the window’s host wall.
- The offset values will be set 0 i.e. on the glazing itself if the host doesn’t define it’s width e.g. some curtain panel grids.
Can room/window groups be automatically created?
- RG_ALL and WG_ALL are created automatically once you close the register dialog after registering the relevent entities i.e. room or window.
- It is not necessary to add room or window manually to RG_ALL or WG_ALL group each time you register. These groups are updated on fly with all entities (room or window) when running calculation.
- Similarly, there are options to create or clear the groups for each entity type in modify dialog. For this follow the following steps:
- Open modfiy dialog from the menu.
- Click on relevent tab i.e. Window / Room
- Then click on
 icon.
icon.
- Also, the group can be manipulated from group dialogue in an organized way. For detailed instruction on group management, see Revit Group Instruction page.